How to Get Clips from YouTube Videos: A Creator's Ultimate Guide
Discover how to get clips from YouTube videos using native tools, screen recorders, and AI. A practical guide for creators to repurpose content and grow.
FlowShorts Team
There are four ways to clip YouTube videos: YouTube's built-in Clip feature (shareable link, 5-60 seconds), the Remix button (sends a segment straight to the Shorts editor), screen recording (quick capture of any video), or downloading the file and editing it in a proper editor (best quality and control).
This guide covers all four methods, plus FFmpeg commands for power users, AI clipping tools, and what you need to know about copyright.
Method 1: YouTube's Clip Feature
The scissors icon under most YouTube videos lets you create a shareable clip between 5 and 60 seconds long. This doesn't download a file. It generates a special link that loops just that segment.
Good for: sharing a specific moment in a comment, group chat, or social post. The clip links back to the original video, so there are no copyright concerns.
Limitation: you can't edit the clip, add captions, or change the format. The creator can also disable this feature on their videos.
Method 2: YouTube's Remix Button (for Shorts)
On the YouTube mobile app, tap "Remix" under any of your own videos to send a segment (up to 60 seconds) directly into the Shorts editor. From there you can:
- Add text overlays and captions
- Add music from YouTube's licensed library
- Apply filters and effects
- Publish as a YouTube Short
This is the fastest way to turn a long-form video into a Short without leaving YouTube. No downloading, no external editors.
Method 3: Screen Recording
Screen recording works for capturing a clip from any YouTube video, including videos you don't own (subject to fair use, covered below).
Built-in tools you already have:
- Windows: Xbox Game Bar (Win + G)
- Mac: QuickTime Player (File > New Screen Recording)
Three things to get right:
- Capture only the browser window, not your full screen. This prevents notifications and desktop clutter from appearing in the recording.
- Set YouTube to 1080p or higher and go full-screen before recording.
- Record system audio, not microphone audio. System audio captures the video's sound directly. Microphone audio captures room echo and keyboard clicks.
Do a 10-second test recording first to confirm both video and audio are clean.
Method 4: Download and Edit (Best Quality)
Create Faceless Videos on Autopilot
FlowShorts generates and posts AI videos to YouTube, TikTok & Instagram while you sleep.
Try FlowShorts Free →For maximum quality and creative control, download the source file and edit it in dedicated software.
If it's your own video: Download from YouTube Studio (Content > three-dot menu > Download). This gives you the original uploaded file with no quality loss.
Recommended free editors:
- DaVinci Resolve — professional-grade, free version handles everything most creators need
- CapCut — simpler interface, strong auto-captioning, good for short-form
This method lets you trim with frame-level precision, add captions and overlays, reformat from 16:9 to 9:16 (vertical), color correct, and export in any format. For more on reformatting for other platforms, see our guide on posting YouTube videos to Instagram.
Method Comparison
| Method | Best For | Quality | Editing Control |
|---|---|---|---|
| Clip feature | Quick sharing, no download needed | Original | None |
| Remix | Own videos to Shorts | Original | Basic (text, music, filters) |
| Screen recording | Quick captures, any video | Good (depends on settings) | Requires separate editor |
| Download + edit | Polished clips, reformatting | Best (original file) | Full |
Power User: Clipping with FFmpeg
FFmpeg is a free, open-source command-line tool for video processing. If you're comfortable with a terminal, it's the fastest way to clip videos without launching an editor.
Extract a Specific Segment
ffmpeg -i input_video.mp4 -ss 00:15:25 -to 00:16:45 -c copy output_clip.mp4
-ss 00:15:25— start time (15 min 25 sec)-to 00:16:45— end time-c copy— copies without re-encoding (fast, no quality loss)
Clip and Convert Format
ffmpeg -i source_video.mkv -ss 00:05:10 -t 00:00:30 -c:v libx264 -c:a aac output_clip.mp4
-t 00:00:30— duration of 30 seconds (instead of end time)- Omitting
-c copytells FFmpeg to re-encode into the target format
Extract Audio Only
ffmpeg -i video_clip.mp4 -vn -ab 192k audio_only.mp3
Create Faceless Videos on Autopilot
FlowShorts generates and posts AI videos to YouTube, TikTok & Instagram while you sleep.
Try FlowShorts Free →-vn— discard video stream-ab 192k— audio bitrate (high quality MP3)
FFmpeg is especially useful for batch processing. If you have 10 timestamps to clip from a long video, you can script all 10 commands and run them at once.
AI Clipping Tools
AI tools can analyze a long video, identify the most engaging moments, and generate ready-to-post clips with captions, music, and vertical formatting. This is useful for creators who produce long-form content regularly and want to maintain a consistent short-form posting schedule without manual editing.
Platforms like FlowShorts handle the full pipeline: scene detection, caption generation, B-roll insertion, and formatting for TikTok, Shorts, and Reels. For a broader look at tools in this space, see our best AI video generators guide.
Copyright and Fair Use
Clipping your own videos is always fine. Clipping someone else's video is where copyright applies.
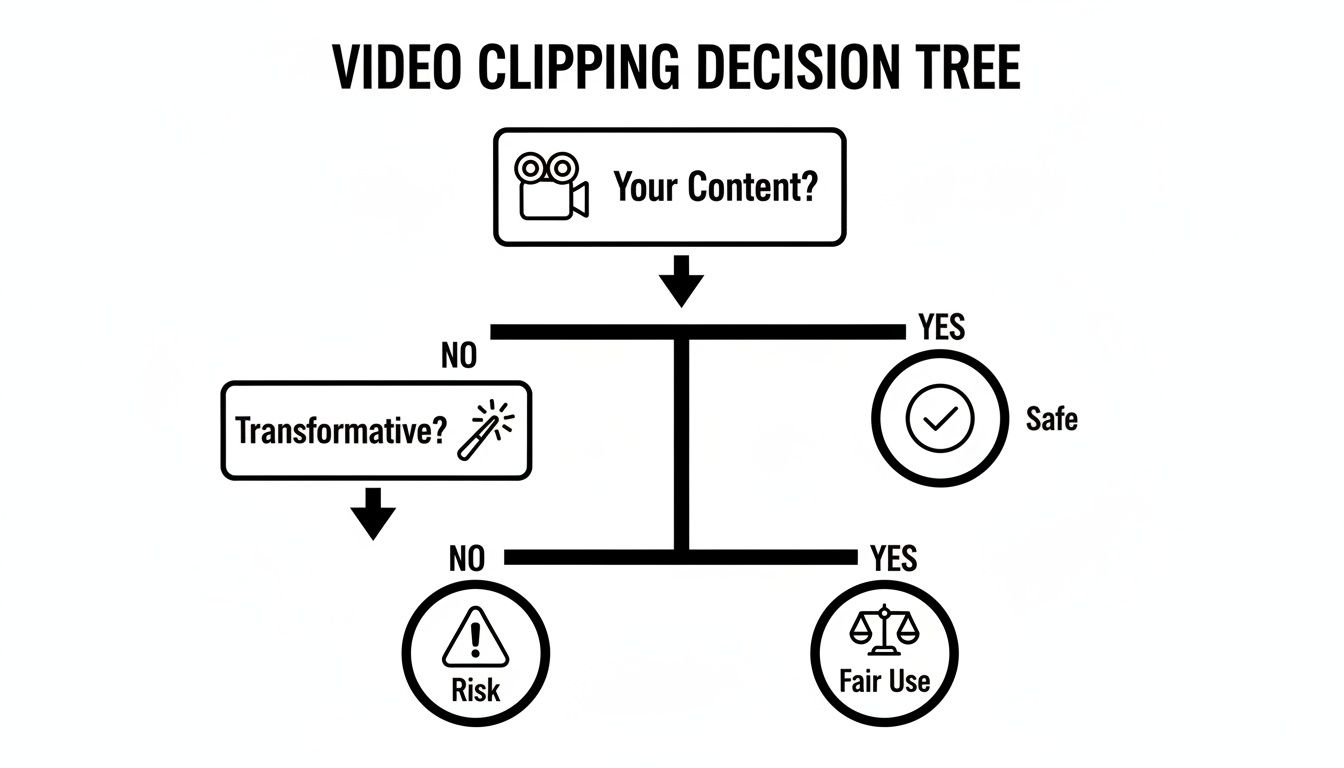
Fair Use is a legal doctrine that allows limited use of copyrighted material without permission, but only under specific conditions. Courts evaluate four factors:
- Purpose: Is your use transformative? Commentary, criticism, parody, and education are stronger cases than simply reposting.
- Nature of the original: Factual content (news, tutorials) is safer to clip than highly creative content (music videos, films).
- Amount used: A 5-second snippet to illustrate a point is stronger than a 5-minute chunk.
- Market impact: Does your clip replace the original? If viewers watch your clip instead of the source video, that weakens your case.
Fair use is a defense, not a right. When in doubt, ask the creator for permission. Always credit the source regardless.
Common Questions
What's the Best Format for TikTok, Reels, and Shorts?
Vertical 9:16 (1080x1920 pixels), under 60 seconds, MP4 format. Burn in captions since most viewers watch with sound off.
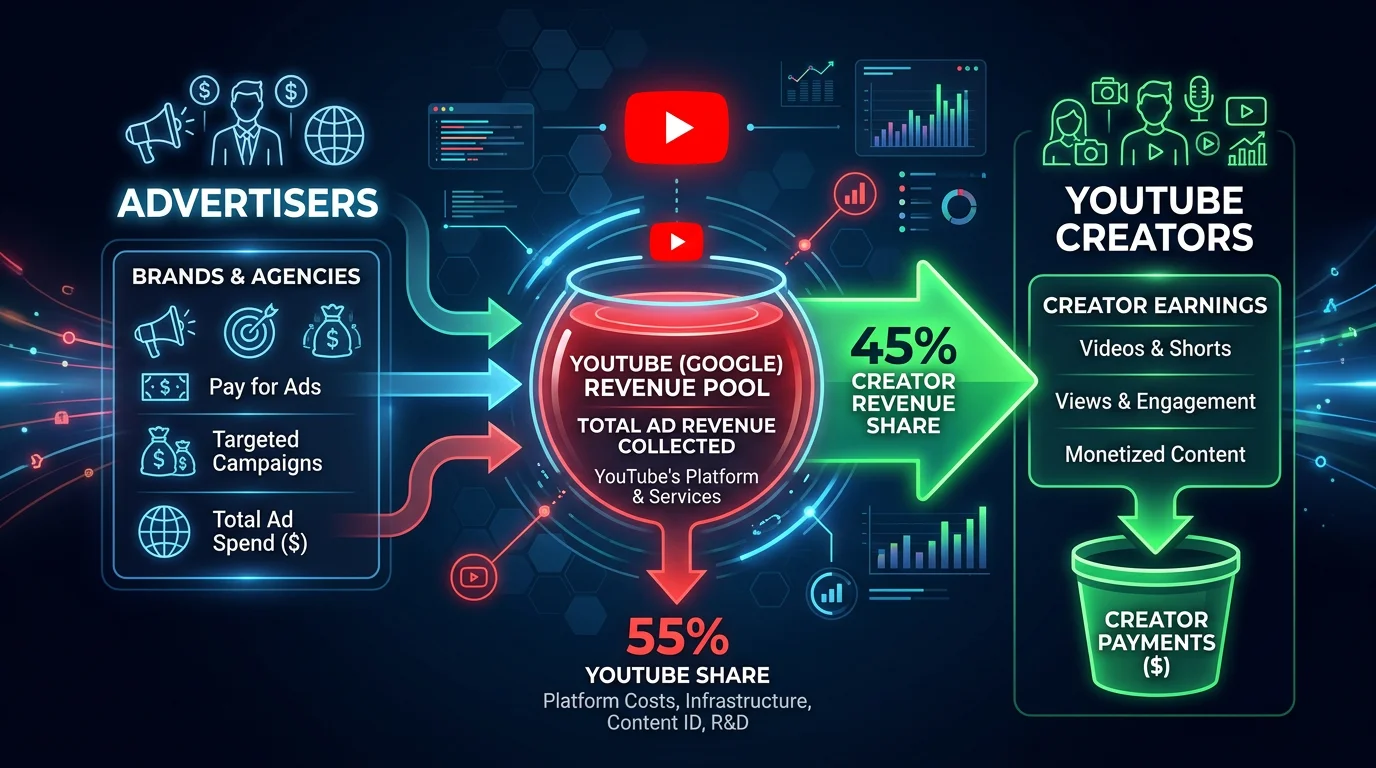
Can I Monetize Shorts Made From My Own Long-Form Videos?
Yes. If you're in the YouTube Partner Program, Shorts created from your own content are eligible for Shorts ad revenue sharing. It's also a good way to drive viewers back to your full-length monetized videos.
Which Method Should I Use?
If you just want to share a moment: use the Clip feature. If you want to turn your own video into a Short: use Remix. If you need full editing control or are clipping someone else's video (with permission): download and edit. If you process clips in bulk: use FFmpeg.
Related Guides
- How to Post a YouTube Video on Instagram
- How to Share a YouTube Video on Facebook
- How to Automate Social Media Posts
- How to Make AI YouTube Shorts
Free tools: AI Video Script Generator · YouTube Title Generator